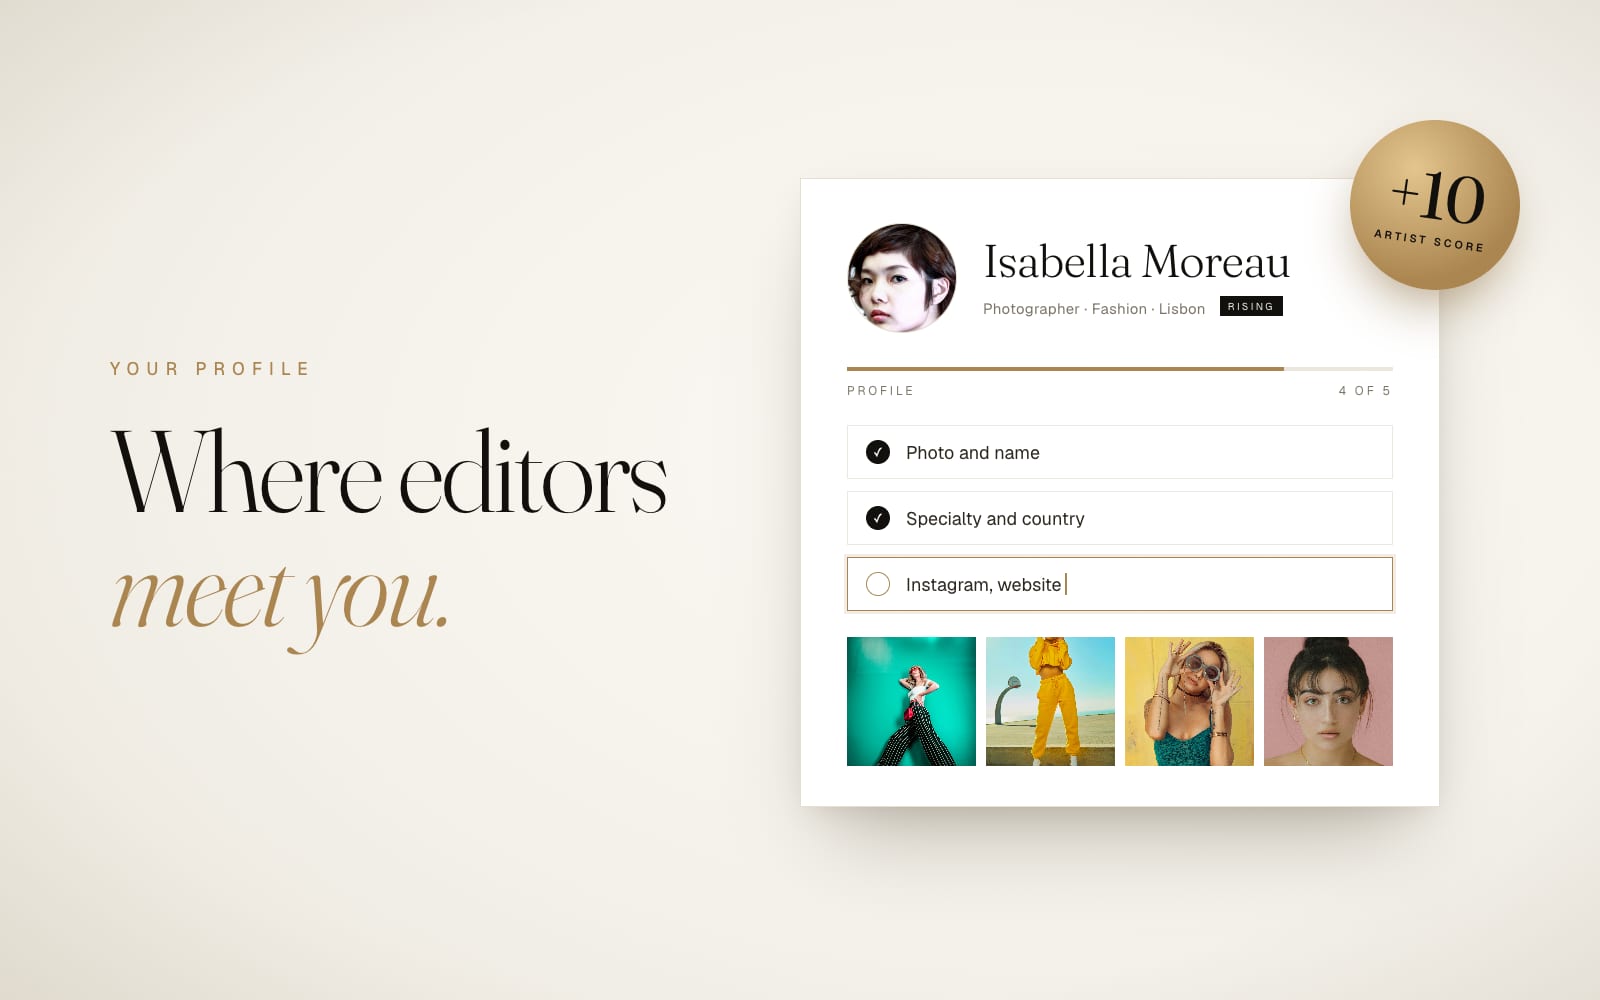
Your profile is the page people open when they want to know who made the work. Editors open it when your series lands on their desk. Clients open it when they are looking for someone to hire. Other creators open it when the Awards results come out and they want to see what else the winner has shot.
It is also your trophy shelf. Every publication, every editors' pick and every Awards place lands there automatically, under your name, with a public link anyone can check. An empty profile with three awards on it looks a bit like a beautiful front door with no house behind it.
The good part: it takes about ten minutes, you do it once, and a complete profile adds +10 Artist Score for as long as it stays complete.
What "complete" means
Six things: a photo, your name, what you do, a short bio, at least one link (Instagram or a website) and three portfolio works. We'll go through them in that order.
Step 1. Open your settings
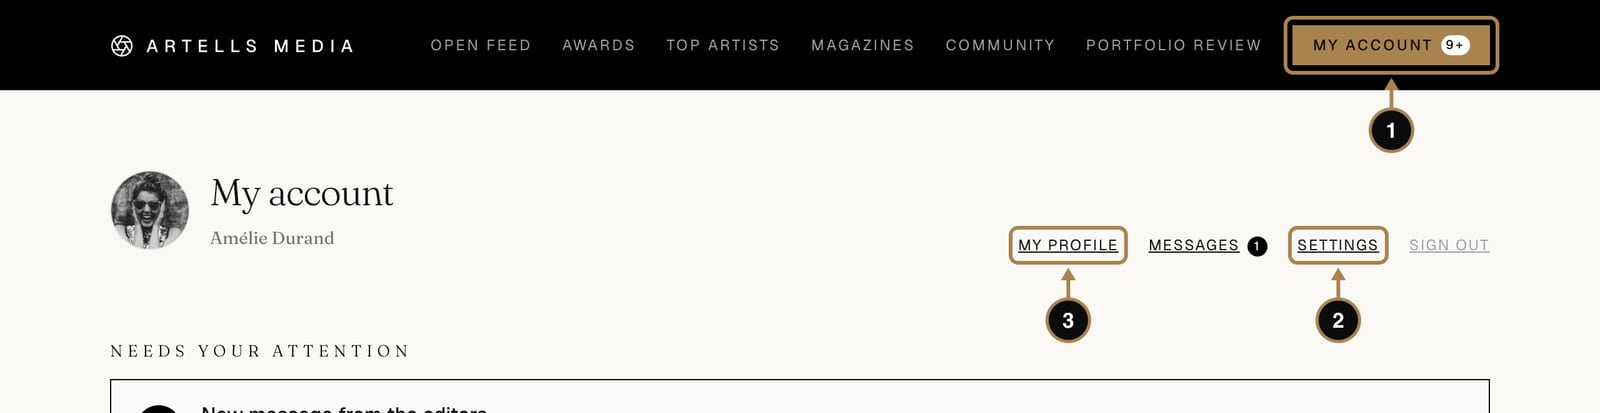
Sign in and click My account in the top right corner (1). On your account page, click Settings (2). My profile (3) shows your page the way everyone else sees it. Keep it in mind, we'll come back to it at the end.
Step 2. Photo, name and what you do
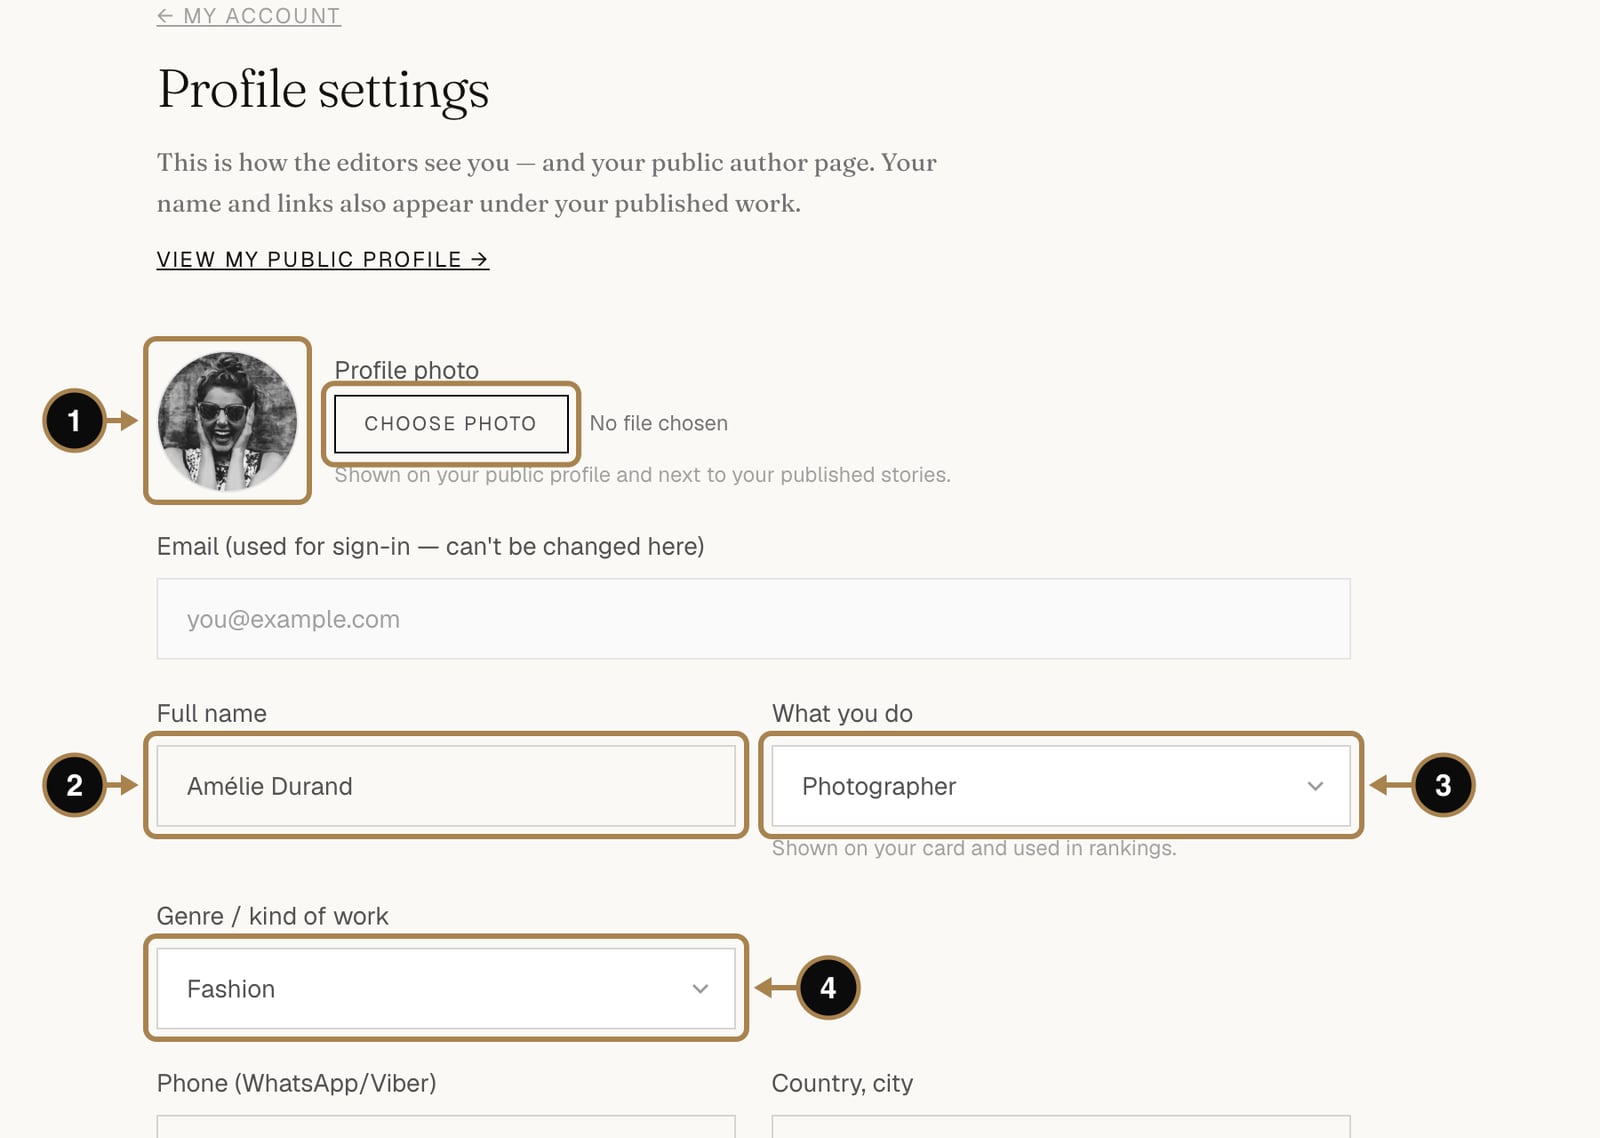
- Photo (1). Click Choose photo next to the round avatar. A clear photo of your face works best. A logo or a cat is charming, and editors still prefer to know who they are talking to. The photo appears on your profile, next to your stories and in the Top Artists lists.
- Full name (2). Write it exactly as you want it printed. This name goes into magazine credits, certificates and verification pages. If you work under a pen name, use it here and everywhere. If you might use publications for a visa one day, use your passport name (our O-1 guide explains why).
- What you do (3): photographer, model, makeup artist, stylist, digital artist and so on. It shows on your card and decides which rankings you appear in.
- Genre (4): fashion, portrait, street, beauty and the rest. It is the second line on your card and helps people find you by the kind of work you do.
The email field above your name is only for signing in. It never appears on your public page.
Step 3. Country, bio and links
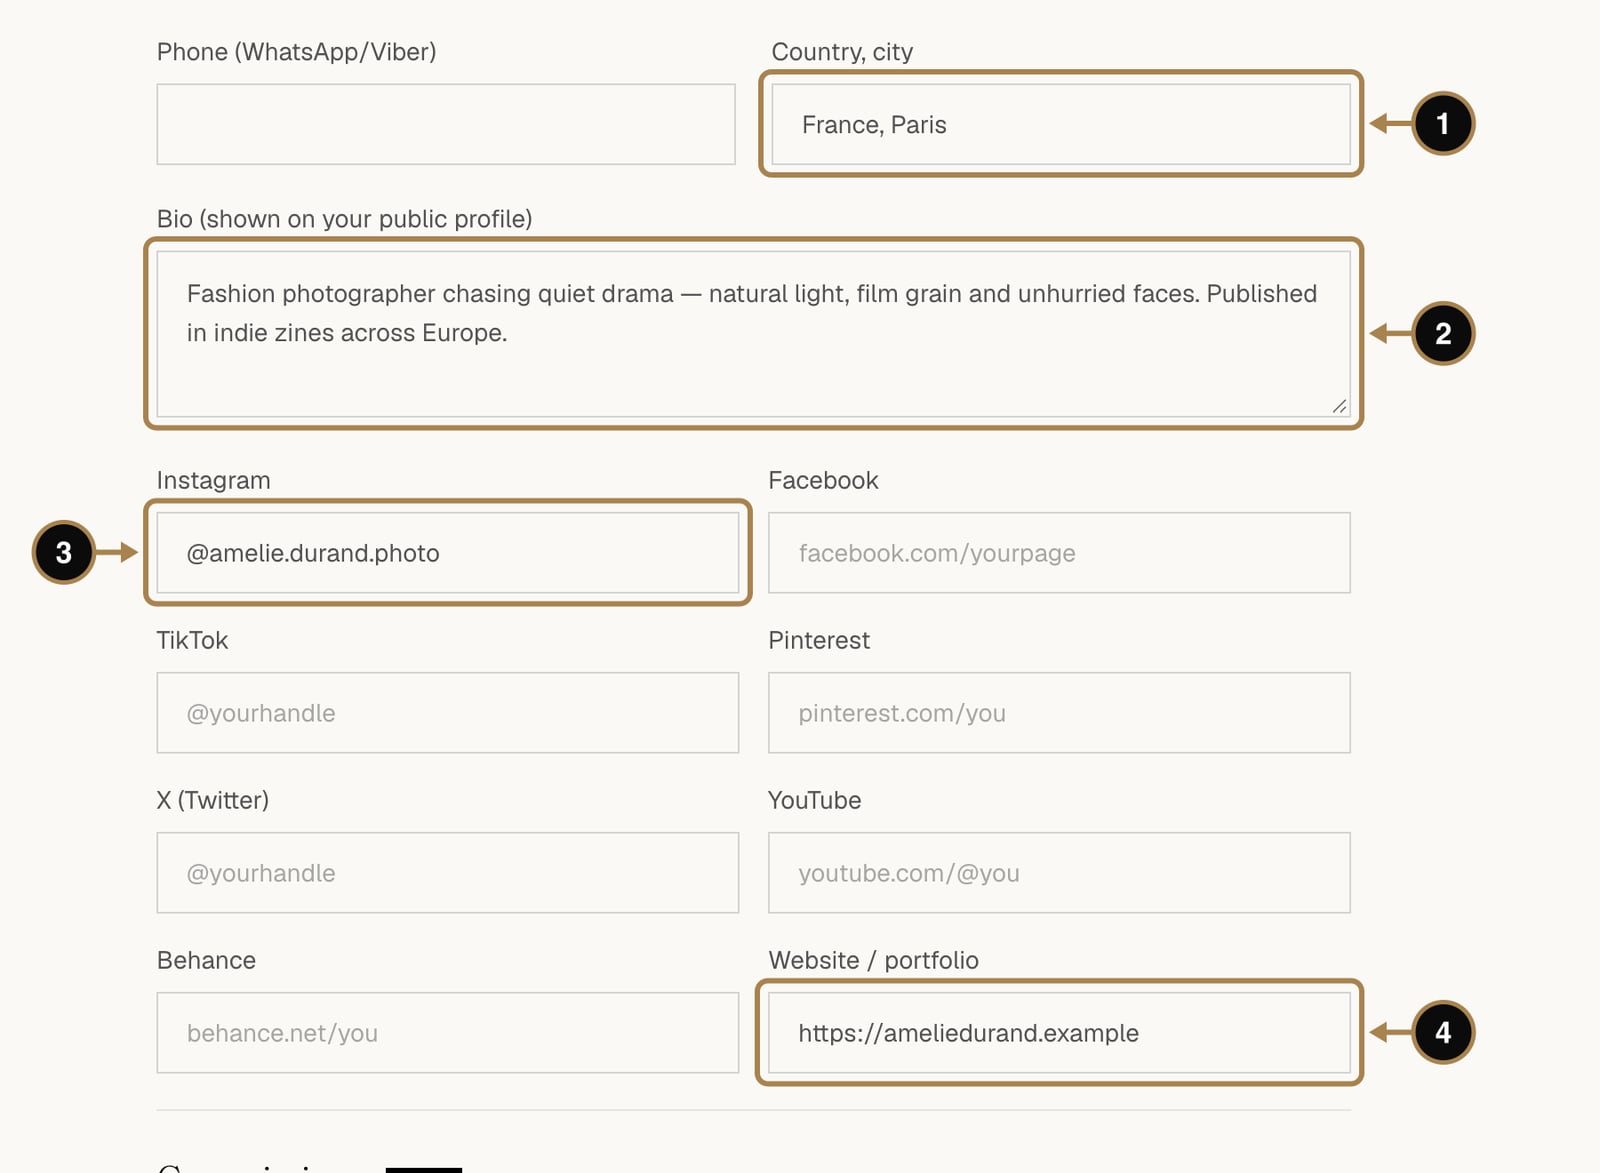
- Country, city (1). Clients often search close to home, and editors like to know where a series was made. "France, Paris" is perfect.
- Bio (2). Two or three sentences: what you shoot, what you love, where you've been published. Think of how a good friend would introduce you at a party, minus the embarrassing story.
- Links (3, 4). Add at least your Instagram or your website. Every filled field becomes a button on your public page. Empty ones stay hidden, so nothing looks unfinished.
The phone number is optional and private.
Step 4. Save
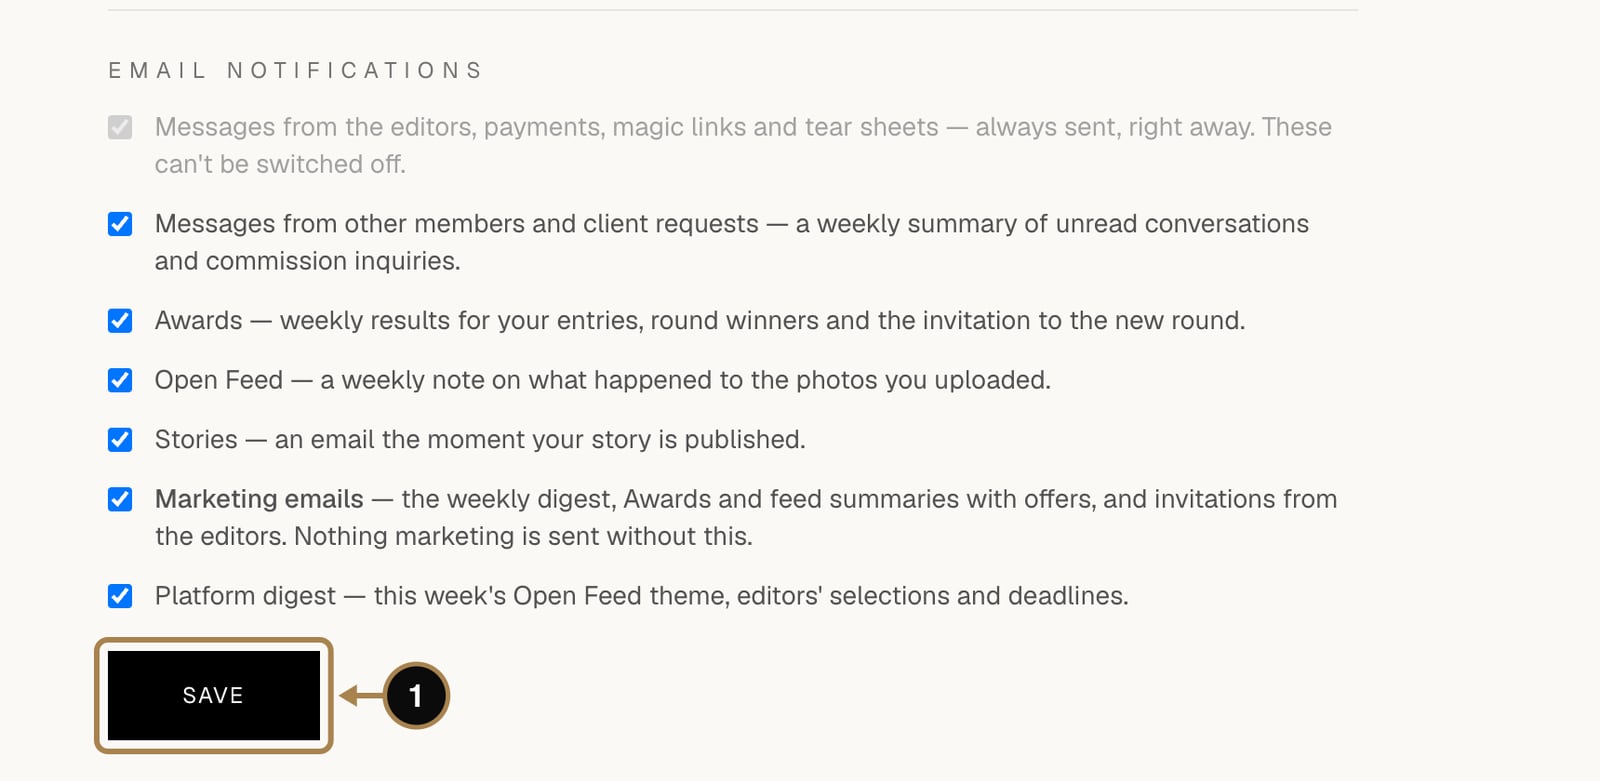
Below the links are your email preferences. Messages from the editors, payments and sign-in letters always arrive; everything else you can switch on or off to taste. Then press Save (1). It stores the whole form in one go: photo, name, bio and links.
Step 5. Add three portfolio works
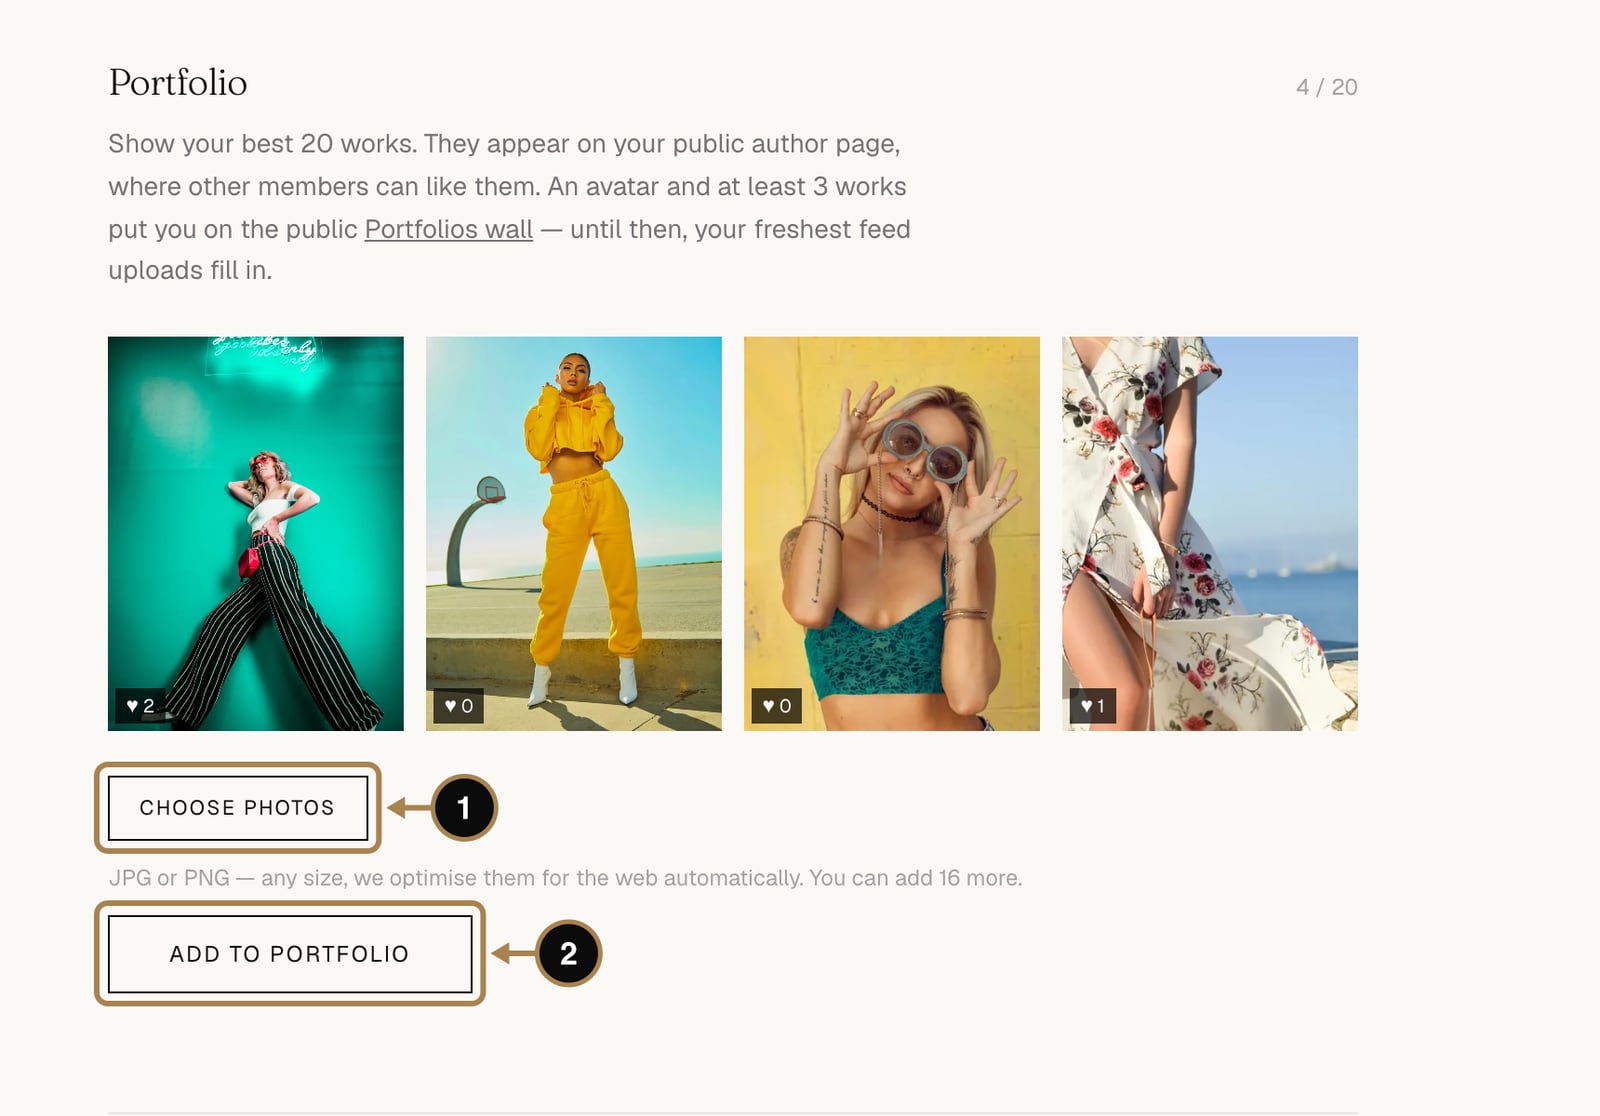
Scroll down to Portfolio. Click Choose photos (1), pick your strongest frames and press Add to portfolio (2). Any size of JPG or PNG is fine, the site prepares the web versions itself.
You can show up to 20 works. With a photo and at least three works you also appear on the public Portfolios wall, where members like each other's work and clients browse. Choose the frames you'd want to be hired for. The little arrows under each picture change the order, and the first one is your opening line: it also becomes the large featured work at the top of your public page.
Step 6. Check your public page
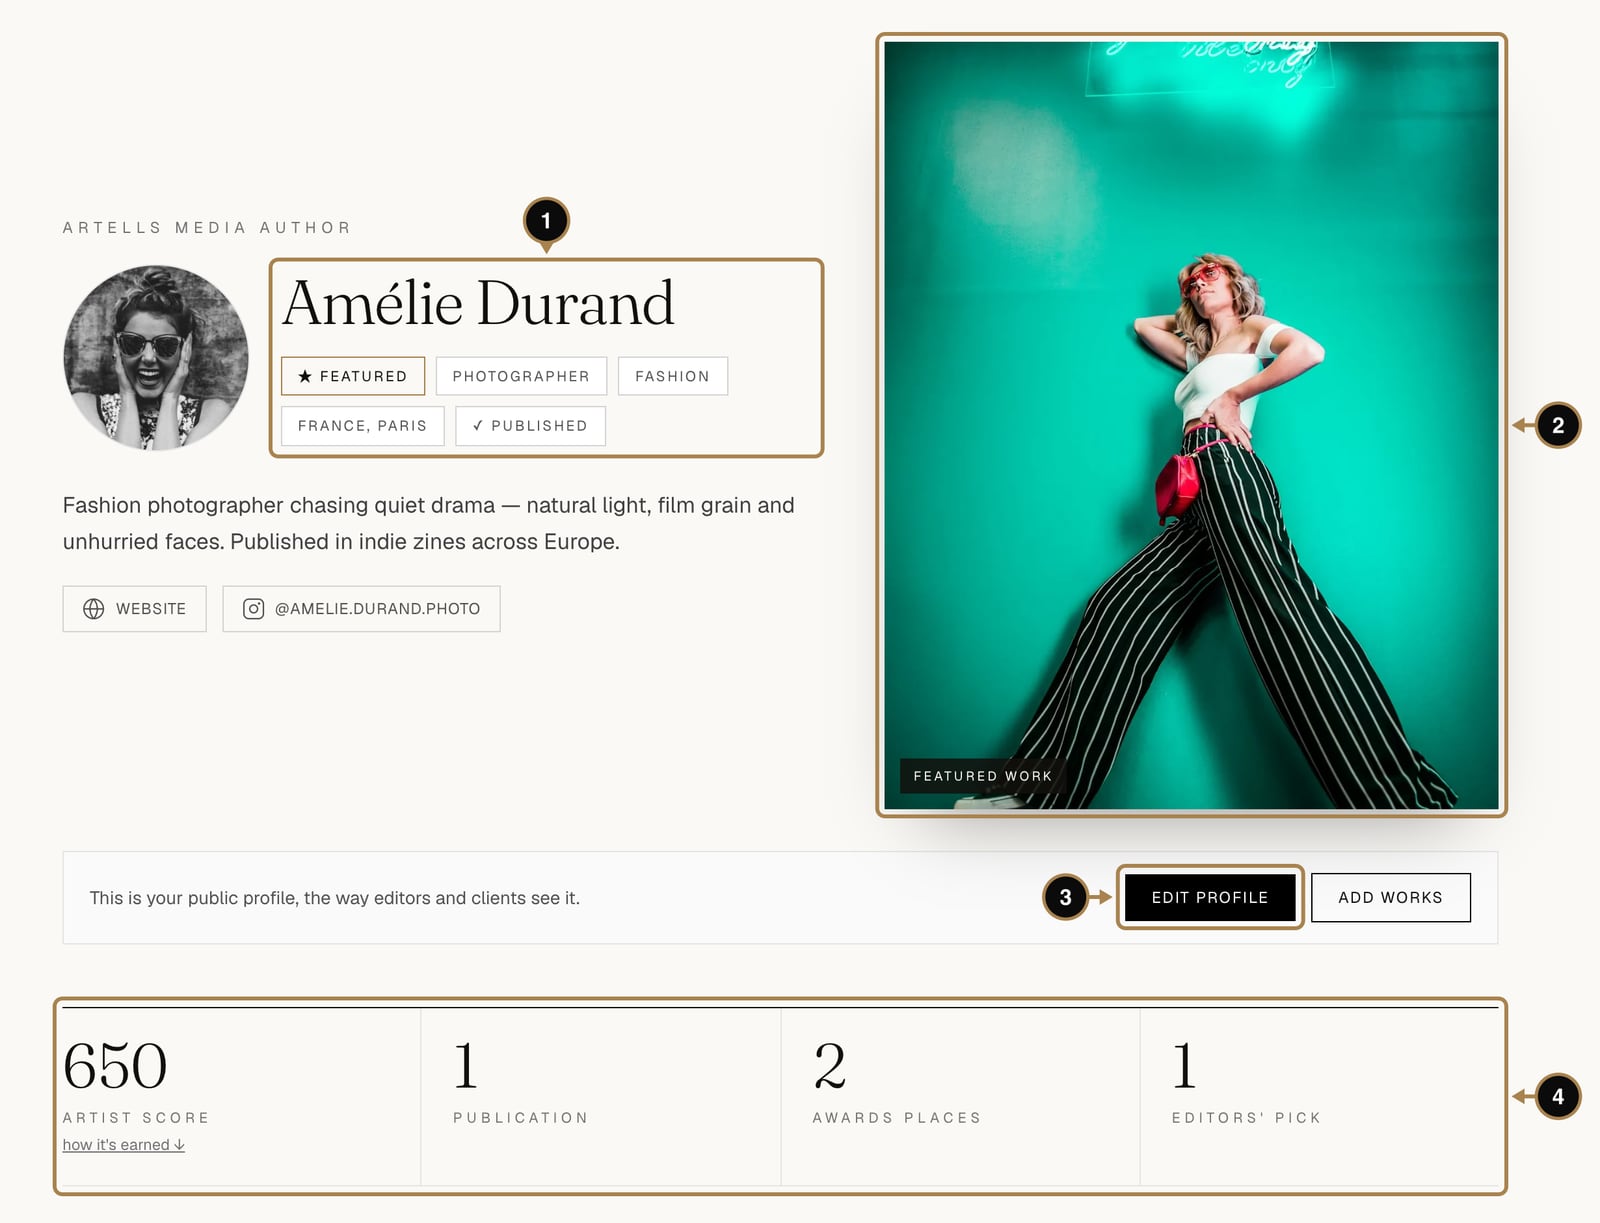
Click My profile, or View my public profile at the top of the settings. This is what editors and clients see. Your name comes first, with small chips for your level, what you do, your genre and your country (1), then your bio and links. On the right sits your featured work (2), the first photo of your portfolio. If something reads oddly, Edit profile (3) takes you straight back.
Under the header runs a strip of numbers (4), the most important first: your Artist Score, publications, Awards places, editors' picks, portfolio works and connections. It shows up to four of them and never shows a zero. If you have fewer than four so far, it adds the month you joined, so a brand-new profile still looks tidy.
Why it pays off later
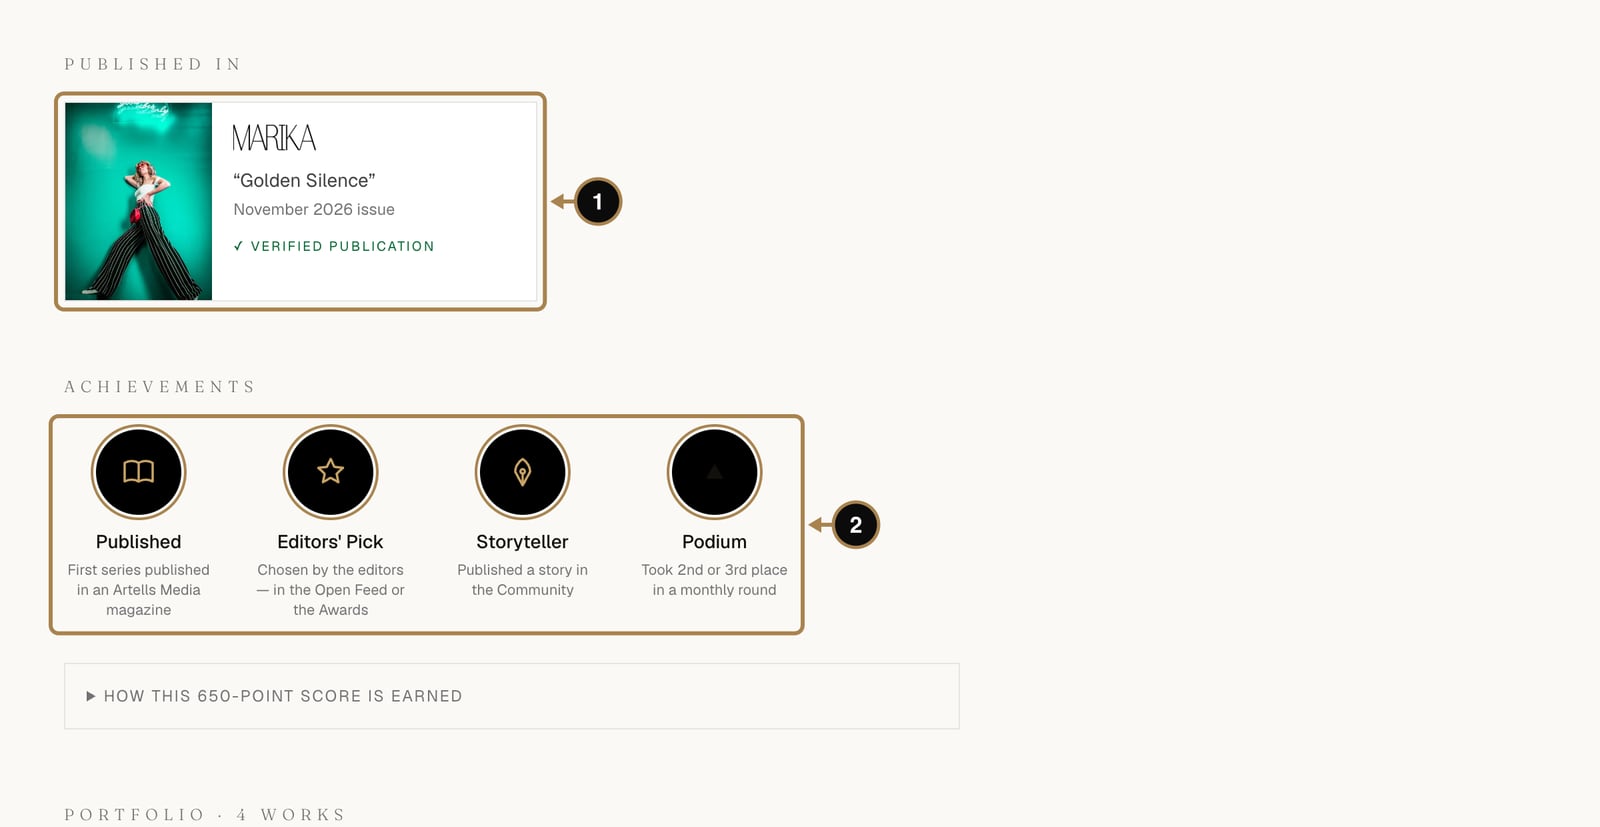
As you take part, the page fills itself in. Every magazine publication gets a card under Published in (1) with a photo from the series, the magazine, the title and the issue, plus a Verified publication link to a public proof page. Achievements (2) appear as round medals when you're first published, picked by the editors, placed in the Awards or when your story runs in the Community.
Further down, your portfolio shows every work in its natural proportions, and once you have more than eight, Show all opens the rest. Awards places and editors' picks have their own section, each with the round name and a Share link to its proof page.
Nobody has to take your word for any of it, because every line links to a page that confirms it. "Published in Marika" in an Instagram bio is a claim. On your Artells Media profile it is a fact with a link.
Frequently asked questions
How many portfolio works do I need to complete my profile? Three, alongside a photo, your name, your specialty, a bio and one link. All six together are what unlocks the +10 Artist Score and keeps it on your profile.
Can I use a pen name instead of my legal name? Yes, and it will carry through to credits, certificates and verification pages consistently. If you may ever need the name for a visa petition, use your passport spelling instead, for the reasons explained above.
Does my email address show on my public profile? No. The email field is only for signing in; nobody but you ever sees it.
Can clients or editors see my phone number? No, the phone number is optional and stays private; it's never shown on your public profile.
What next
Your profile is ready. Now let's give it something to show. The quickest first step is the weekly Open Feed: How to upload to the Open Feed and why.
Comments
Sign in to join the conversation.
No comments yet — be the first.